Catch-Up Time: the Killer Sandworm Beastie Hat

Almost a year-and-a-half ago, my co-worker and friend Samantha gave me a little book full of knitting patterns for baby hats, mittens, and scarves. And every single pattern features an awesome monster.

20191216_163137

How cute is this?! So freaking cute. (Here’s a link to go get it!)

She was pregnant at the time, and eventually had her son that November. He was the recipient of the extremely awesome Star Illusion Blanket at the time, but with this new book in tow, I knew that I had to get it together and make him a monster of his very own for his first birthday.

20191031_123917

Introducing…the Killer Sandworm Beastie Hat!

20191031_124227

Now, you’re not going to find this guy in the book exactly, but you will find his inspiration, Serrated Shark Hat. However, I didn’t have enough gray yarn to do the entire body and fins, so I had to get creative.

I started matching up other yarn leftovers (and seriously, this book is amazing for using up all kinds of odds and ends), and found a bunch of black Brown Sheep Nature Spun leftover from my Hamilton hats. I’m pretty sure that the gray that I had was left over from Mischief Managed, but I can’t be totally sure, but it matched weight almost perfectly.

What to do? Stripes!

20191031_124041

I also wasn’t the hugest fan of the way that the teeth worked in the original pattern, so I went on YouTube and found a crochet sawtooth pattern that made some hilariously pointy teeth. (Here’s the link for that one!)

20191031_124056

With its goth stripes and bright green eyes, Dan and I couldn’t deny its uncanny resemblance to the stripey sandworms from Beetlejuice.

Quick note:  Snap-in doll’s eyes are great for this, but they have extremely pointy and scratchy ends that end up on the inside of the hat, rather than being hidden inside the stuffing like they would normally be. To combat this, I sewed some little felt patches to the inside of the hat, covering the posts. I didn’t get any pictures of this, but just make sure you’re keeping those baby heads safe.

I got some pictures from Samantha a few days ago of her son enjoying his hat, and they are just so precious I can’t stand it.

received_597586744117440

received_420469262174718

I mean…those crazy pointy toothed ear flaps just make me so insanely happy. I desperately need an adult-sized one right away.

20191031_124257

Stay tuned for more baby-related projects! It’s never-ending!

Catch-Up Time: Cardamom, the friendly dragon, and the Little Dragon Hat

I am very tired.

For the past eleventy-billion weeks, I have been heavily involved in my (hopefully) second-to-last semester of grad school, including performing my DNP project. And working. And writing a million papers. This may sound like complaining, but really, I think that I’ve earned the right just a little bit. It’ll all be worth it when I can make people call me Dr. Jinger, right?

Right.

Anyway, throughout all of it, I have still been working on a multitude of projects, mostly because my loved ones just will not stop having adorable babies and letting them grow up into adorable toddlers. It’s relentless. So, for the first of these “catch-up” style posts, I’ll be featuring two freaking adorable knitted items that I made for one of the super cute babies in question.

My wonderful friend Tobias and his girlfriend Alexis welcomed a baby boy in September, and because these are the dear friends with whom I lived out my D&D adventures for many years, I knew that I had to make them something that was both adorable and adventure-based.

20190816_175649

“Where thou go’est, weary traveler?”

20190816_175156

Presenting, Cardamom, the friendly dragon.

This sweet little guy was knitted up using the fabulous free pattern Tarragon the Gentle Dragon from Knit-A-Zoo, purveyor of all sorts of cute knitted animals. I loved the original name, but I definitely more of a sweet than savory person, so Cardamom it is.

This pattern really threw me for a loop while I was making it and putting it together, mostly because I just couldn’t get over how freaking cute all of the details were as they appeared. Like, there are little toe bumps on the dragon’s feet.

20190804_134857

Toe bumps!

20190802_192642

The shaping of the head alone gave it so much personality, even before the eyes and spikes got added.

And the spikes!

20190804_155213

Although I had no idea what to expect when I started knitting that little purple strip of spikes (seriously it took me a minute to understand exactly how they would work, but, just trust the pattern, it knows what it’s doing), they sewed in so perfectly and were, by far, my absolute favorite part of the project.

20190804_161507

But, wait! The wings!

20190816_175059

And his little tail!

20190816_175130

So good.

I didn’t really modify anything here, because everything was so perfect. The only thing I did was use my standard felt eyes, rather than the pre-made doll eyes suggested by the pattern, just because I want all of my handmade creatures to look a little bit sad for some reason.

20190816_175145

That face.

20190816_174935

Such a sweetheart.

Now, I had plenty of yarn left over, and I knew that just a little dragon toy wasn’t enough, especially for a future adventure-baby, so I figured that I had to make a little bit of adventuring gear to go along with it.

What better than a little dragon hat to match his new dragon friend?

20190819_131652

20190819_131635

Modeled here so excellently by R2D2 is the Little Dragon Hat, made from the pattern Little Dragon by Fox & Crow. Fox & Crow’s website is a smorgasbord of cuteness and style, albeit all in Dutch, but do go give it a look and feel all kinds of knit-based envy.

20190819_131726

The overwhelming delight of being able to match the hat to the stuffed animal? Almost too much.

20190731_162053

This one was so much fun, even during the little fiddly bits. I have to admit, somewhat sheepishly, that I originally attached the wrong color and knit 2 spikes in green before I realized that something was wrong.

20190816_175415

And then, after I was finished with all the spikes, I had to go back and undo and replace the very first one again, just because it was one stitch off from laying flat with the other ones, and it was going to make me go insane if I didn’t fix it.

20190816_175459

It was definitely worth it to get it perfect. The hat is a little (lot) too big for the baby right now, but I know he’ll get plenty of use out of it later, when he’s venturing out to explore his new world.

20190816_175343

Don’t they make a charming pair?

I knit both of these with Debbie Bliss Rialto DK, but really any DK- or sport-weight yarn would work wonderfully, as long as it’s not too high on the acrylic/viscose/whatever-plastic content. I only say this because you need to do a fair bit of ironing for the dragon’s spikes and for getting your hat spikes perfect and pointy, so you don’t want something that’s going to melt or get weird and shiny. Rialto is a 100% merino with a very fine multi-ply structure, so you get really good stitch definition.

For these projects, I managed to make both out of 3 balls of Apple and 1 ball of Wisteria, but now that I think about it, I don’t even think that I touched the third ball of the green. August seems like forever ago, you guys. Stay tuned for more catch-up posts as I try to piece back together a year that felt like it took 3 years to pass.

Summer of Baby Blankets, vol. 1 – Autumn Vindauga, plus a rainbow friend

It’s the self-imposed “Summer of Baby Blankets” over here at Casa Jingersnaps. This summer, not one, not two, but three of my coworkers are pregnant, and I just couldn’t let those opportunities to make adorable baby blankets pass me by.

20180531_101422

First up, the Autumn Vindauga Blanket.

My friend Christina, who you all remember from her Moderne Baby Blanket a few years ago, is going to have her second baby later this summer, and to say that I am extremely excited about it is a vast understatement. Christina is one of the world’s loveliest people, and she deserves all of the happiness possible in the universe. I try to do my part with general at-work goofiness, but when I get the chance to make things for her, that’s when I feel like I can really show her the love that she deserves.

20180518_160143

In college, I used to take the paint strips from home improvement stores and use them as bookmarks. It seemed like an arty thing to do while in theatre school, but the habit stuck. Dan regularly brings home new paint strips for me whenever he goes to buy gardening stuff, and they dutifully mark my place in all of my novels and textbooks to this day.

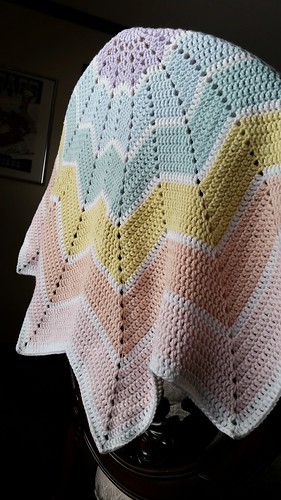
What on earth does this have to do with anything, you may ask? Well, when Christina and I started looking at baby blankets on Ravelry, we were struck by how insanely beautiful Astrid Sivertsen‘s Vindauga Blanket was. It’s a huge project, with seemingly 64 different unique colors, all made out of hand-dyed sample mini-skeins that the author made herself. It’s stunning, and absolutely a masterpiece of dying and handknitting skill.

However, I am not a hand-dyer in any way, and I would probably ruin hundreds of dollars of yarn in the attempt to make anything even close to this thing of beauty. What I do have though, is a mastery of the subtle art of drawing things out on graph paper, plus a love of little boxed of color stacked on top of other boxes with white borders in-between.  You see where I’m going with this?

20180425_154247

I sat down with the color chart for Cascade 220 Superwash Merino (a workhorse yarn with amazing stitch definition that still somehow makes one of the softest, squishiest fabrics possible after blocking) and some colored pencils, and I plotted out a plan. Since the original Vindauga pattern is more of a recipe with changeable elements, rather than a strict pattern, I knew I’d be able to adjust things without too much stress. I plotted out 7 rows and columns, 7 colors ranging from brown to green, passing through reds and golds on the way, going through the blanket on the diagonal.

If you look closely, you’ll see that the whole thing is plotted out like a crossword puzzle, with diagonal symmetry, pairing the darkest with the lightest color, then the next darkest and lightest, then the next set, until everything meets in the middle. Those among you that enjoy these things can then catch out the inconsistency if you wish. Give up? The center block doesn’t follow these rules, mostly because I just wanted an extra block of that gorgeous burnt orange, so that throws off the whole thing a tiny bit. Oh well, it was worth it.

20180531_101216

For those of your who’d like to make your own with the same autumn colorway, here’s the colors: Rich Brown (03), Raspberry (22), Burnt Orange (06), Golden Yellow (05), Artisan Gold (08), Dark Moss (10), and Tree Top (15), with the “frame” color of Cream (01). You’ll need 1 skein each of each of the window colors, and 2 of the border color, and you’ll be knitting it up on size 7 needles, or whatever gives you the fabric you desire. My Prismacolor pencils weren’t exactly the right shades, but you get the idea.

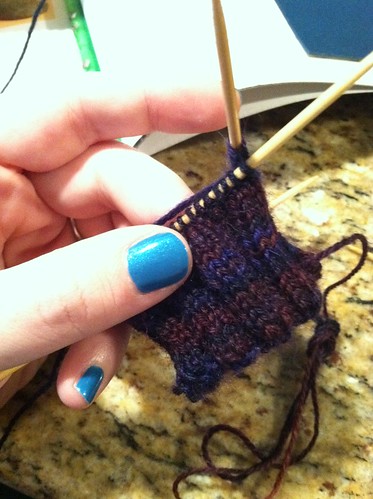
After all of the colors were picked, then I knitted the strips for the blanket. Because the original pattern calls for 2 strands of what I assume is something sort of fingering-weight held together, I had to make some modifications to adjust for the light worsted I was using. Each vindauga (window in Old Norse!) is 24 sts wide and 14 ridges high in garter stitch, with the frame borders 3 ridges high.

20180519_113745

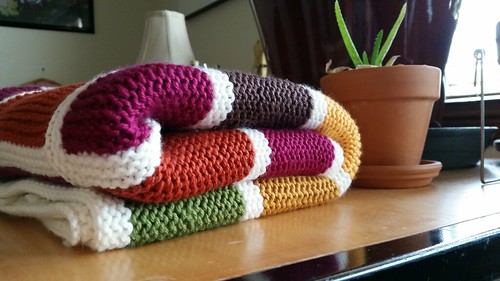
I was in love with my little garter stitch sushi rolls.

After all of those strips were knit, there were a lot of ends to weave in.

20180519_113841

See? A lot.

20180519_114252

It’s hard to see, but because of how stretchy the garter stitch fabric is, I chose to weave in each end by following the stitch lines, mimicking the last row of stitches to both conceal the ends, but also to allow for the blanket to stretch and move without working out the ends accidentally.

20180519_121648

If you’re following along at home, that’s 7 windows per strip, plus 6 border areas, which means 26 ends per strip. Not to mention the ends still to come with joining the strips together. It’s a little maddening. You just have to keep thinking good thoughts.

20180523_184034

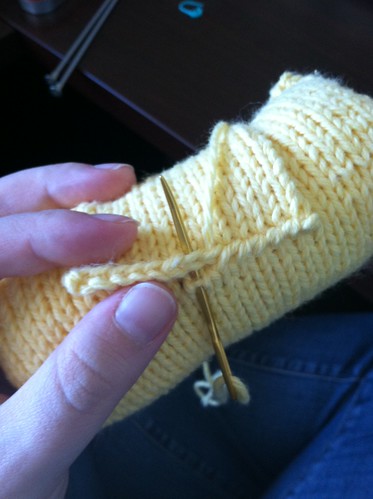
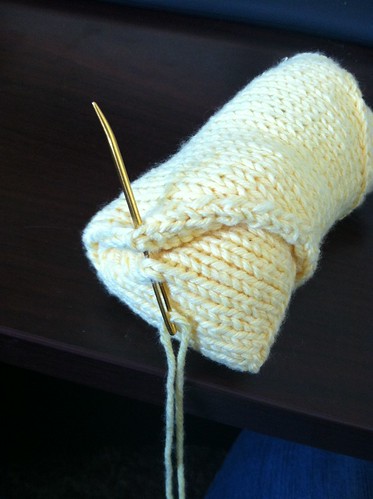
Then came the process of grafting the strips together. I’m sure that the process used in the original pattern makes sense, but I couldn’t wrap my head around it. Instead, here’s what I did. I picked up and knit 2 rows of cream onto the sides of each seam. Then, I held the right sides together and grafted them together with Kitchener stitch, but I treated both rows like the right side. That means, for each stitch, I pulled the yarn through knit-wise to take the stitch off, and then pulled through purl-wise to leave it on, rather than switching between the two depending on their needle position. This will make more sense when you’re in it, trust me.

20180523_191746

20180531_100814

That way, I ended up with perfect purl bumps right in the middle of the frame. It took a bit of perfecting over time, especially with keeping the tension just-right, but after doing 6 of them, each 116 stitches long, it became second-nature.

20180531_100805

Ugh. So pretty. What a cool way to join strips. What a cool way to make a blanket in general. Astrid, you’re the coolest.

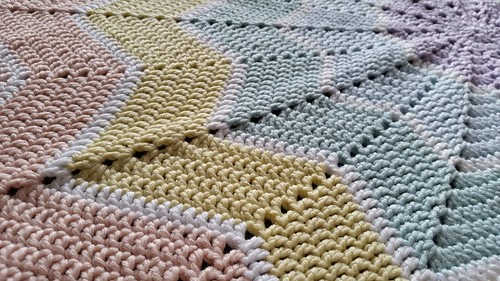
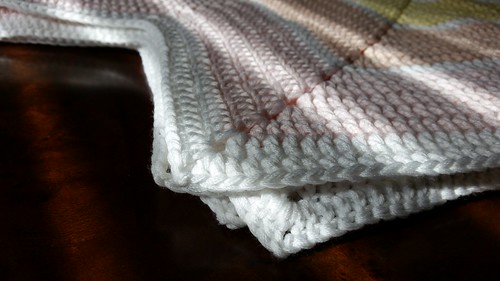
As for the border, the pattern has you do provisional cast-ons, and you leave your stitches live at the tops of each strip, so picking up your stitches is so much easier than you’d think. I picked up 2 stitches per “frame” section between the strips, just to keep things nice and even.

20180531_100904

In the corners, you increase two stitches on opposite sides of the corner each time to keep the corners flat and pointy. I just did bar increases, leaving the little row of knit stitches in place to mark the corner lines. I really like how it makes it look sort of “beveled” there, but you can do whatever increase strikes your fancy.

20180531_101304

Then, you weave in all of those remaining ends. Of which there are…26 more? I think? So 208 ends? I’m glad I didn’t know that before I started, or I might not have had the strength.

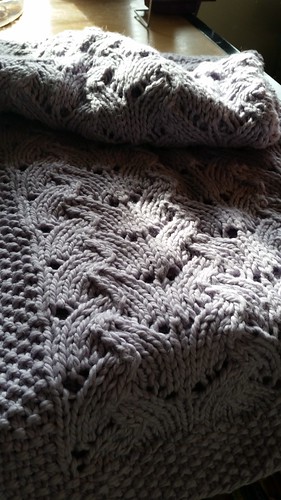
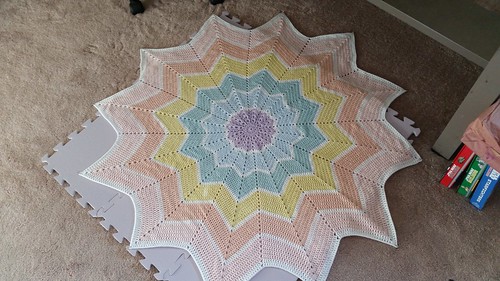
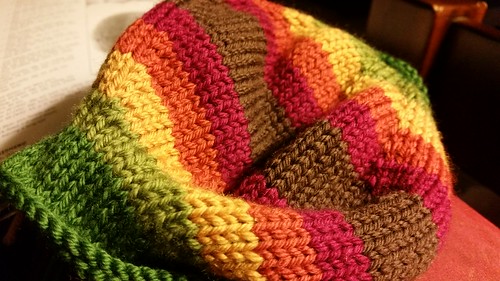
And then you can block it, which is really just a magical experience with the Cascade 220 Superwash Merino, because it just turns into this gorgeous silky stuff with amazing drape, while still keeping your garter stitch ridges all popped and perfect.

And then, just marvel at the thing for a while.

20180531_101252

20180531_100753

20180531_100728

20180531_100912

20180531_101041

And then wonder if you have the inner fortitude to make a queen-sized one, because you want to cover every horizontal surface in your house in those perfect little garter-stitch windows. They’re so good.

Now, if you did yours the same way that I did mine, you’ll end up with a tiny bit left over of each color. Just enough to make you think that you need to make a extra something special for the big sister. I’m a big proponent in getting presents for the other kids when there’s a new baby, so they don’t feel left out of the celebration.

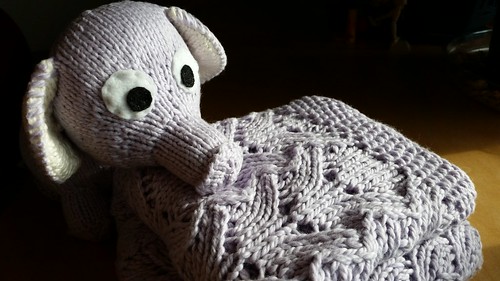
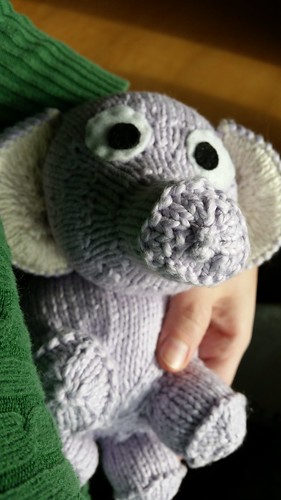
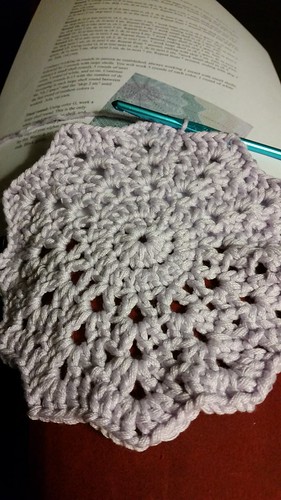
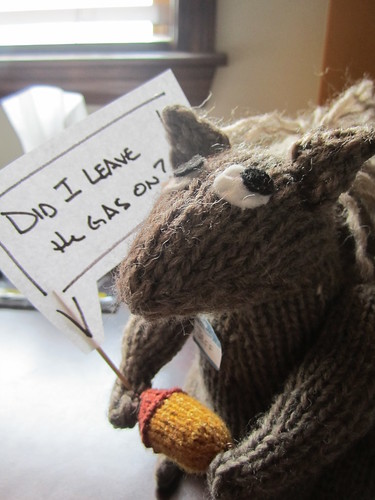
Enter I Can Knit a Rainbow, a puffy little piece of adorableness designed by Clare Doornbos and featured in Knitty‘s First Fall 2014.  I used each color, moving from greens to brown, accidentally leaving out the Artisan Gold, but then ultimately not being too broken up about it because it came out so dang cute.

20180703_150620

20180703_160703

Look at that 70s modern kitchen color template action. All that mustard and burnt orange and avocado. Turns out, I can knit a 70s rainbow, and it’s even cuter than I thought it would be.

20180703_173933

20180703_174232

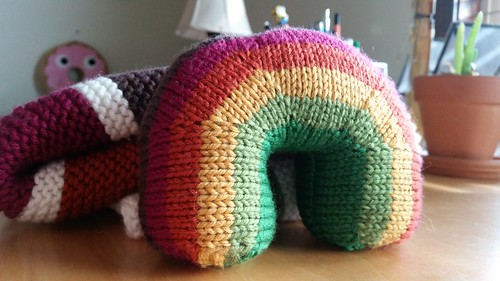
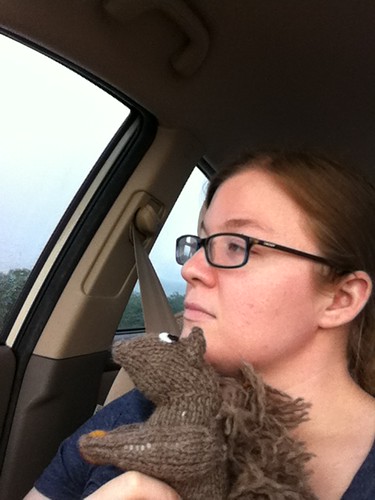
It’s so soft and squishy and adorable. I want to make a million more of them and hand them out on the street to everyone. The more rainbows, the better.

20180707_094656

And so ends the first installment of the Summer of Baby Blankets. But don’t worry, there’s plenty more cables and colorwork and nit-picky pattern adjustments to come.

Lace and Cables and Elephants

20171218_150407

For my last baby blanket of the year (I was about to say there’s been a bunch, but really only two others. But seriously three baby blankets in a year plus working and grad school? That’s a lot. I’m super proud of those beautiful things, so please do go look at them here and here.), I present this lovely piece of lace and mock-cabling.

20171218_150533

Uuuunnghh. So pretty.

20171218_150441

This gorgeous thing was made for my friend and former nursing school group partner extraordinaire, Bonnie. Bonnie is one of the nicest people I have ever met. She has never been anything but welcoming and sweet to me, even though I can be sort of a prickly person to get to know (especially when I was in nursing school…sorry everybody). She is full of smiles and encouragement, and I am always happy to see her.

We work in the same hospital, except she’s in the NICU, being one of those superheroes that takes care of all of the tiniest, most fragile patients that there are. I get pulled there occasionally, to my general terror, because I am always scared to death that I am going to break a baby. When she’s there, I know that there’s a wonderful friendly face alongside me, ready to answer questions and make me feel comfortable.

20171218_150434

A girl like that deserves something really lovely for her new baby, and I’m more than honored that I got to make it for her. She wanted something sort of simple and classic, and I think that SweaterBabe‘s Fancy Stitch Baby Blanket was just the perfect choice. I tried to come up with a better project title than “Fancy Stitch,” but really…”fancy” describes this pretty aptly.

20171218_150158

I used Blue Sky Cotton for this, because it is the most perfect yarn for baby projects, in my humble opinion, and that gives the lace and curves a really wonderful squishiness. It’s a long-wearing, good, strong cotton, but it feels absolutely luxurious here.  I want an entire adult-sized blanket made out of it.

20171218_150338

The whole thing came out so elegant. Perfect for a soon-to-be sweet wonderful baby.

I had to make a little squishable buddy to go with this blanket, and the grayish-lavender color (number 644, if you really needed to know) just screamed “elephant” to me.

20171218_150308

This little guy was made using leftovers of the lavender, plus some of the white left over from the chevron blanket. The pattern? Elefante by Susan B. Anderson, who has so many more patterns for some of the cutest plushies I’ve ever seen.

20171218_150704

He is so plump and adorable. Plus, I love the little ridges for the edges of the footpads and trunk. Good stuff. When I sent a picture of him over to Dan, he declared that he looks like an anteater, so we’re calling him Arthur.

There is only one issue. If Arthur’s left unsupported…

20171218_150640

…he looks a little…depressed. In the original pattern, this is more of a design feature with his trunk supporting his head and acting a bit like a fifth foot. However, when I adjusted his eyes to be more muppet-y (just like I like them), I felt like I needed to push up his ears to make his face more open and friendly. Which ended up just making him look like he’s Eeyore, staring at the ground sort of sadly.

20171218_150720

But he’s just perfect if you hold him and play with him and squish him, which is exactly what the best stuffed animals are for.

20171218_150239

Arthur also looks super cute just sort of resting on things, like he’s intently watching everyone else walk around. I’m choosing to think of it as a design feature.

I did make one other tiny change, due to the fact that crocheting the ears as written with their tiny, tiny stitches and multiple crocheted increases caused me physical pain. Instead, I knitted up some circles and whip-stitched them together after folding them in half. The little whipped stitches really make it feel homey and handmade to me. For those who are inclined to make some tiny elephant ears, here’s the instructions:

Ears (make two):
CO 3 sts, and distribute them evenly across 3 double-pointed needles.
Knit 1 round.
Kfb across all sts (6 sts total).
Knit 1 round.
Kfb across all sts (12 sts total).
Knit 1 round.
Kfb across all sts (24 sts total).
Knit 2 rounds.
Kfb across all sts (48 sts total).
Knit 3 rounds.
Bind-off all sts.
Fold each circle in half, with the right-side facing out, and whip-stitch the edges together.

Then follow the rest of the pattern as written!

This project was the cap on a really great knitting year, most of which I haven’t posted about yet, due to its super-secret-ness. Don’t worry though, that’ll all be coming soon. For now, just enjoy that lacy squishy elephant goodness and go make your own.

Rainbow Ripple Love

20171109_094336

I don’t really have very much clever to say. Just look at this beautiful thing that I made for a minute.

20171109_094427

20171109_094348

Just…

20171109_094149

…it’s so pretty. So pretty that I was honestly surprised when I was done that it was something that my fingers actually made.

Anybody else ever get that feeling? Some sort of crafting-based imposter syndrome? Just me? Okay.

Anyway, this lovely thing was made for my friend and coworker KB, who just gave birth a day or two ago to her first baby. There’s been a bit of baby-craziness around work lately, with 6 different ladies having babies within the last 6 months, and that’s just on our floor. And there’s still more to go, so I’m not quite done posting baby blankets yet for this year. With so many tiny babies popping up, it was inevitable that some of them would get covered in my handmade love, yes?

KB and I went through Ravelry for quite a long time, looking for the exact perfect blanket. She didn’t want to know the gender of the baby ahead of time, and she was definitely game to go for something bright and fun and colorful. She was also really into the more classic vintage look of crochet, rather than knitting. She’s a good person and a good friend, so I was willing to suffer through the pain that crochet puts my fingers through for her.

When we got to the project page for Celeste Young‘s stunning Rainbow Ripple Baby Blanket, we both fell in love. What a gorgeous pattern, full of opportunities to be creative and make all kinds of different crazy beautiful starbursts. However, it’s hard to get much better than the original pastel rainbow, and that’s what KB wanted. I got as close as possible by sourcing the Berroco Comfort through a few different places (mostly through the good, good folks at LoveKnitting.com), but I could not find a skein of Limone to save my life, probably because it’s discontinued. Instead, I subbed in Buttercup, and I don’t think anyone would have known if I hadn’t mentioned it. Whoops.

20170821_150133

Want the full color list? Grape Fizz (9708), Boy Blue (9707), Robin’s Egg Blue (9714) (which is actually the most lovely greenish-gray teal), Buttercup (9712), Peach (9704), Pretty Pink (9705), and Chalk (9700).

20170821_160411

20170822_204313

Working on this was also a really great experience, despite the finger pain involved. Am I holding the crochet hook weird or something? I get cramping and soreness in my middle and ring fingers on my right hand, no matter the project or the yarn or the tension involved, every single time I crochet. This doesn’t happen with knitting, unless I’ve been working on something for hours. It might also have been worse this time due to the crazy amount of handwritten SOAP notes and scholarly hand-typed nonsense that I have had to produce this semester, but I’m pretty sure it’s not the cause.

Enough complaining. This thing was a joy to create. I’m always a sucker for simple design that turns into something really elegant, and those perfectly lined-up double crochets in those chevrons really do it for me.

20170912_170317

20170912_171443

I didn’t even get freaked out about all of the ends I had to weave in. It was nothing but love.

20171109_094520

The only thing that I changed about the pattern was adding an extra “double” row of the white at the end, just to make the final border look more…final.

20170912_172050

Rainbow in the sink!

20170912_174244

Blocking this was a bit of a challenge, due to the fact that once the whole thing was done, it was larger than my blocking mats, so some creative pinning had to take place. I guess this means I need to send out into the ether a wish for some more awesome Knit Picks interlocking blocking mats to magically appear on my doorstep. However, that means that this blanket is big enough for all kinds of tummy time and snuggling for a good long time.

20171109_094258

20171109_094401

It was worth it. Such good chevron starburst action.

I had quite a bit left over of all of the wonderful Comfort colors, so I knew that I needed to make a special friend for the new baby to go with the blanket.

20170924_193852

Enter Frank. I was so into the Robin’s Egg Blue, that I knew I wanted to feature it, and I had the most leftovers of the Grape Fizz. It’s lucky that they work so well together in Deja Joy‘s Tessa the Turtle Amigurumi pattern.

20171109_094600

I literally squealed when I realized that the crochet stitches made a little “ridge” between the top and bottom shells. You have to love those little details.

The only thing that I changed about the pattern on this one was using my standard felt muppet-y eyes, firmly stitched in place, rather than plastic doll eyes. I think he looks a little bewildered, but friendly, perfect traits for a first soft friend.

20171109_094106

As for the name Frank, when I finished him up and presented him to Dan, I said, “What do you think this guy’s name should be?” I fully expected turtle puns or T-related alliteration. Dan turned towards me, glanced at the turtle, and said, “Frank,” and then went back to watching Nascar.

20171109_094243

Frank, it is.

Both KB and baby are still in the hospital after a little bit of a rough entry into the world, so let’s all send them some good vibes. Hopefully they’ll both be home soon, safe and warm and wrapped in rainbow love.

I met Joy the Baker and gave her an eggroll. True story.

On Tuesday, Joy the Baker had a book-signing here in New Orleans before she started on her book tour for her new offering, Homemade Decadence.

2014-10-17 791

No one who reads this blog, or reads any food- or baking-oriented blog (or maybe any blog ever) should be surprised to know that I have a fairly serious girl-blog-crush on Joy the Baker. Doesn’t everyone? She makes absolutely beautiful food, blogs about her mistakes, has a feisty orange cat, and rocks cool tattoos and glasses. She might be who I want to be when I grow up (and perhaps who my blog personality thinks that I actually am), even though she is only 1 year older than me. She just recently moved here in January, and I am so glad that she’s here in my hometown to enjoy the food and weirdness along with us, although I am extremely jealous of the amazing morning light she gets in her French Quarter kitchen.

2014-10-17 792

For her book-signing, I decided to continue my self-imposed tradition of bringing small knitted objects to famous people that I feel have influenced a part of who I am. Perhaps you might remember when I gave David Sedaris an owl? Or attempted to bring Eddie Izzard a squirrel? Well, this time I decided to bring Joy the Baker a present, but it was for her lovely orange cat, Tron-Cat, who makes the occasional appearance on her blog and whom I decided needed a little bit of knitted love.

2014-10-17 754

Unfortunately, I made this decision on early Tuesday morning, and then had to wait until I was finished with class, and forced myself to rush home as fast as possible to knit an eggroll. That’s right, an eggroll with catnip. The pattern is from the Spring 2003 issue of Knitty, Feline Dim Sum by Julie Falatko, and it is so freaking cute that I can’t stand it.

2014-10-17 758

I love how that picture of the wonton toy stuffed with catnip looks so illicit up there.

2014-10-17 762

2014-10-17 765

2014-10-17 766

I had previously used this pattern in 2004 to make some little toys for my brother’s cat, Chunky, and it was only about 5 minutes before she discovered how to bust open the eggroll and regale herself in catnip all over the floor. Slight adjustments had to be made.

2014-10-17 768

It’s only catnip! I promise!

2014-10-17 769

In order to keep things super secure in there, I first stitched down the flap as instructed, although I did it extremely crookedly for some reason. Let’s chalk it up to nerdy excitement and being pressed for time.

2014-10-17 771

Then I tacked down the corners of the top of the flap, just for good measure, running the yarn along the top for a few stitches…

2014-10-17 772

…then pulling it back down and tying it into a knot…

2014-10-17 773

…and finally threading the ends through the middle of the stuffing to hide them. I left all of the ends long inside there in order to prevent any accidental, or cat-rage influenced, unravellings.

2014-10-17 787

Then, it got a label and was photographed. Notice how I suddenly had the presence of mind to let the recipient of one of these gifts know my name and the name of my blog? After the Eddie-Izzard-and-Jeff-the-Squirrel debacle, I’m never not shamelessly self-promoting again. I managed to get everything done in 2 hours and 15 minutes, with just enough time to pick up Dan and head to the bookstore.

2014-10-17 083

I’m pretty sure that this is the moment when I said, “I have a present that I made for you, but it’s not only for you. It’s for your cat.” Notice the adorable confusion? This was the intended effect.

2014-10-17 081

She told me that I couldn’t possibly be for real, but she seemed delighted all the same.

2014-10-17 082

I know that I was.

2014-10-17 793

She was also super funny and adorable in person, just as I suspected. I managed to keep my fangirl-type tendencies in check as much as possible, and somehow didn’t embarrass myself or trip over my shoes the entire time. A triumph of the human spirit.

And can we talk about this amazing book? It’s got so much fantastic stuff in it (so many ice cream recipes!) that I haven’t even been able to properly absorb it yet. My winter break from school will certainly be filled with delicious things because of this wonderful lady. Joy, thanks so much for being lovely, too. Don’t ever stop making people happy. Good advice for everyone, really.

Squirrel Updates? Well…

005

First things first. A boy, and a girl, and a squirrel went on a road trip from New Orleans to Austin.

2014-07-02 220

2014-07-02 225

The squirrel, we’ll affectionately call him Jeff (because that is his name), was a little confused.

He didn’t know that he was being transported over to his new future owner, the amazingly funny Mr. Eddie Izzard.

2014-07-02 230

2014-07-02 228

“Who’s this guy?”…he seemed to say. He was about to find out.

2014-07-02 234

My brother and his fiancée gave us a wonderful experience to celebrate my birthday this year: tickets to see Eddie Izzard’s new show, Force Majeure. Jeff was packed up into a lavender tote bag and carted off to the show, where he got a fantastic seat.

169

The squirrel’s perspective might leave a little too much to the imagination. Here:

165

Just imagine a fabulous man in a fancy suit, complete with top hat and umbrella standing right in front of that and being incredibly funny. That’s what it was like. (We are good little rule-abiding audience members, and we didn’t do any illegal picture-taking or recording during the show, so this is as good as it gets.) Make sure you add in the fact that I was smiling so hard that my face hurt. And clapping. And giggling like a lunatic. And really appreciating how many times the name Jeff got dropped.

Now, we need to back up just a little bit. Upon arriving at the venue, I made sure to find a responsible- and kind-looking usher-type security person so that I could ask them the best way to make sure that Jeff the Squirrel got to Eddie Izzard. All of the ladies I spoke to were extremely kind as I got sent higher and higher up the ladder of responsibility. My final conversation took place with a lovely woman who told us that he would be conducting a Q&A session in the lobby about 15 minutes after the show, and that she figured that the best time to see if I could get it to him would be then. We thanked her profusely and then walked into the theatre to enjoy the show.

And enjoy it we did. The man does not disappoint. He even threw out a bunch of callbacks to older bits, particularly lots of references to the Death Star Canteen (click it up for Lego interpretation hilarity), much to my happiness. He is, quite possibly, the only man in the world who can make a whole theatre full of people laugh while talking about human sacrifice. And for that, I adore him.

After the show ended, the audience began to travel to the lobby and condensed around the stairs, much to my chagrin because I am a very short person. Everyone was extremely eager to get photos and videos of the Q&A session, probably because documentation was not allowed during the actual show.

172

I was a little bit closer than this (Dan stayed off to the side in order to avoid the crush), but when you are not much taller than five feet, it’s very hard to make yourself noticed, even if you have a squirrel.

I had done my best on the days preceding the show to alert Mr. Izzard to the fact that I would be bringing him a handmade gift to the Austin show, but I didn’t receive any response, not really to my surprise.

squirreltweet

I am aware that most famous people with social media, especially extremely busy touring comedians who are also training for a marathon and preparing for a political career (Seriously. He is amazing.) probably do not do much of this for themselves. Either that, or they might not think that I am all that amusing, but I’d rather not think about that too much. All the same, I was hoping that he got the message and that it might have been slightly memorable enough to get through.

Unfortunately, it did not. I attempted to hold up Jeff in his lavender tote bag at every opportunity for question-asking, but was not really noticed, as far as I could tell. After the session was over, he was out of there fairly quickly, and I found my way over to the same super nice security-lady that I had spoken to before. However, this time, she handed Jeff the Squirrel off to a rather unsmiling man with an official-looking security headset. Even though he assured me that he would definitely pass him along, I got the feeling that there was yet another man in Austin who was not terribly amused by me or my handknit-animal shenanigans.

So Jeff went off into the ether, and I, ridiculously, had not enclosed any information with him as to my name or the name of my blog.

I know. I am terrible at self-promotion, apparently. I did send out another message into the Internet and directly to Eddie Izzard about Jeff’s fate, but I have not yet received any sort of response.

Cue the sad trombone.

That’s not to say that the whole trip ended up on such a blah note. Dan and I had a really great time, mostly stuffing all of Austin’s various food offerings into our faces, if my iPhone photos are any indication.

2014-07-02 226

Mexican food.

2014-07-02 231

Italian food. (I am such a sucker for anything with a completely obvious label, especially if it’s edible.)

2014-07-02 239

Argentinian food.

2014-07-02 240

Ice cream food. (I just typed ‘ice cream good’ on accident. This is the truth. Amy’s double chocolate chip with Reese’s peanut butter cups. I didn’t want to leave this place.)

2014-07-02 244

And some of the most delicious sushi ever set in front of me.

Plus, I made rice pudding for my brother and his fiancée…

2014-07-02 242

176

And assisted in harvesting some okra, which are now sitting in my fridge, waiting for me to pickle them. I am so excited.

179

Can we talk for a second about how beautiful okra flowers are? I had no idea. I want to fill my whole backyard with this stuff.

2014-07-02 238

I also received another amazing present, my very first manicure and deluxe pedicure experience, from my brother’s fiancée. I had only ever gotten a manicure once before, during my freshman year in college, and the lady doing it pretty much spent the entire time yelling at me about the state of my cuticles, so we’re just going to say that it doesn’t count. I had such a wonderful time being pampered, because it is certainly not something that I would ever have thought to do for myself. Anyone else in the healthcare field knows how much nursing can tear up your hands, and I felt (and still do even later!) super special and suddenly very ladylike. I took the opportunity to show it off and admire the teal against my newest pair of socks (details to come later).

—–

So? The final verdict? I can only hope that Jeff made it to his final destination safe and sound with Eddie Izzard. If not, I hope he ended up with someone who thought he was cute and will take care of him and that he didn’t get thrown in the trash. I’m going to try my best to not let the uncertainty get to me, because it was such a lovely trip and a wonderful present to receive.

2014-06-22 156

I will definitely not let any of this experience change my mind about knitting tiny animals for people who mean a great deal to me, especially if they are famous people. I am aware that it is a strange thing to do, but I feel that there are way weirder things to be known for on the Internet. I can only hope that they get to their owners eventually.

Maybe next time.

Mr. Izzard, I Made You a Squirrel (or…Jeff the Squirrel)

2014-06-22 138

I love Eddie Izzard. I’m not sure when I saw or heard him perform for the first time, but it was love at first sight/listen. He is the funniest man alive. Everytime I hear someone say that they did something absolutely insane (or when I catch people sleeping in the big squishy chairs at the bookstore), I hear his “like you do” in my head in that wonderful lilt. I also hear his voice whenever I say the word “jam.” I offer “cake or death” at every opportunity. I like my coffee covered in beeeeees. I have declared that the mouse is under the table, the cat is on the chair, and the monkey is on the branch.

Those who aren’t in the know don’t realize that this stuff is hilarious. Story of my life.

Dan gets it, though. He even got me a birthday cake covered in beeeeees.

102

See?

My brother also knows about my deep-seated love, and he surprised us with tickets to go and see him in Austin this weekend as my birthday present this year. I may have danced a little when he told me. More than a little. I then concocted a plan that seems extremely similar to a plan that I had last year around the same time: I would knit Eddie Izzard a squirrel and present it to him in some way at his show, just for him to have for no reason. Like you do.

2014-06-22 137

This little guy is named Jeff (obviously) after Jeff, the god of biscuits, Jeff Vader, Jeff Jeffty Jeff, and all of the other strange Jeffs that find their way into Mr. Izzard’s wonderful stories. (Oh my god, I just saw that they sell an “I’m Jeff Vader” t-shirt on his website. Waaaaaant.)

2014-06-22 142

He has been interrupted during his frantic acorn eating with distressing thoughts as to whether or not he left the gas on.

Fabulous.

eddie_izzard2014-06-22 134

Twins, yes?

2014-06-22 145

The pattern for Jeff the Squirrel came from the adorably titled Knit One Squirrel Two by Rabbit Hole Knits, purveyor of all sorts of knitted cuteness. His acorn came from the Spiffy Little Acorn pattern by Revati Poole, also so tiny and adorable. (Ravelry links all, by the by.)

2014-06-22 148

I think that knitting and sewing on those teeny tiny little ears was my absolute favorite part.

2014-06-22 153

Making his slightly worried facial expression runs a close, close second.

2014-06-22 146

And that huge fluffy tail was a great deal of fun as well, even with the ridiculous amount of tiny knots and unwinding of yarn strands involved. The tutorial for this is located here. I had some trouble finding it at first on the main site, so I figured that anyone else who wanted to join in the fun shouldn’t have to waste time searching for it, too. All you need for it is a pipe cleaner and a good movie to watch while you make knots.

2014-06-22 151

Whenever I see this picture, all I can hear is, “That squirrel is looking at me,” in my best Brian Fellows voice.

This little guy was just a joy to work on, and I was more than a little sad to finish him up. However, I know that he’ll bring joy (or at the very least, delighted confusion) to an all-around fantastic person, which more than makes up for it.

2014-06-22 156

The only trouble is…how do you manage to give a squirrel to Eddie Izzard? With my David-Sedaris-owl-giving, there was a book signing involved, which made the whole hand-off of the adorable knitted item a lot easier. This is a whole different type of event, a stand-up show in a big theatre…I have no idea how to present him with his squirrel. Ideas have been tossed around like waiting out at the backstage door after the show, speaking to security guards and having them pass it along, passing it hand-over-hand (crowdsurfing the squirrel!) until it reaches the stage…All equally weird and seemingly likely to fail. I’m thinking that I might just send him a tweet linking to this post? I have no idea. I would like to just come off with as little of a hint of stalkerishness as possible.

All I want is for an awesome person to have a handmade gift. And how could you say no to this face?

2014-06-22 155

You’re right. You can’t.

Baxter the Bunny, a new super-squishable friend.

I promised some bunny action last time, didn’t I?

2014-01-02 080

Here’s Baxter!

My brother’s girlfriend, now fiancée, Kim, had expressed a desire in getting a stuffed bunny ever since she saw the infamous David Sedaris owl. I figured that Christmas-time was probably the perfect time to make that happen, but when I was searching for patterns, I had a hard time finding something small and squishable, yet full of potential personality. Nothing had that perfect proportion like the original owl pattern did of fatness and plumpness, while still having enough room for an expressive face, although some things came really close.

2014-01-02 092

Enter Big Cuddly Bunny by one of the all-time greatest knitting sites ever, the Purl Bee. Purl Soho’s blend of whimsy, retro style, and good old-fashioned solid crafting is always right on point. Their giant crazy bunny was going to work just fine, but he just needed to be miniaturized.

2014-01-02 073

Here are my pattern changes, so that you can make your own tinier, yet still super cuddly, version for yourself. BIG GIANT NOTE HERE: I am not claiming the genius of the Purl Bee to be my own. I am only posting my pattern modifications for this particular project. Please go visit them to get the original pattern if you wish to partake in the bunniness.

2014-01-02 088

Trip wishes that he could, but being without thumbs makes the knitting kind of difficult. He’ll just settle for biting everything instead.

2014-01-02 072

First off, our materials are obviously slightly different. I used Cascade Yarns Ecological Wool, color 8085, the leftovers from my totally awesome, yet seldom used (because I just know that the cats will eat it somehow), Hemlock Ring Blanket. Way less than one skein’s worth, obviously. I used double-pointed US 7 needles as well. And you’ll need some black and white felt for Baxter’s quizzical expression, along with white and black sewing thread.  The gauge is somewhere along the lines of 4.5-5 sts per inch, but the main goal is just to get a sturdy fabric that won’t stretch out of control when stuffed.

Now for the real changes.

During the “THE BOTTOM” section, change Round 13 to *P6, kfb, repeat from * to end of round. (64 sts)
Then, go on to Round 14: Purl.
Round 15: *P7, kfb, repeat from * to end of round. (72 sts)
Purl 6 rounds.

Changes to “THE BODY”?
First, start by knitting 35 rounds.
Round 36: *K7, k2tog, repeat from * to end of round. (64 sts)
Rounds 37 & 38: Knit.
Round 39: *K6, k2tog, repeat from * to end of round. (56 sts)
Rounds 40 & 41: Knit.
Round 42: *K5, k2tog, repeat from * to end of round. (48 sts)
Rounds 43 & 44: Knit.
Round 45: *K4, k2tog, repeat from * to end of round. (40 sts)
Rounds 46 & 47: Knit.

2014-01-02 087

Follow the rest of the finishing steps detailed here, except you obviously won’t need a whole bag of stuffing. Just stuff your bunny up plump as you can. You’ll be able to add in the last bits of fluff before you close him up, so don’t worry if you can’t get it all in there right now.

2014-01-02 074

No changes to “THE BUNNY’S LEFT EAR.” Just do that all as written.

2014-01-02 084

The only change for “THE BUNNY’S RIGHT EAR” takes place when you are reorienting your stitches to get to the second ear. Since we ended up with more stitches at the top than the original pattern, you’re going to have 10 stitches between the ears on either side of the top of the bunny’s head, meaning that a total of 20 sts are not being used to make the ears. Just knit the ear as stated, making sure that you have left the proper amount of stitches in the middle to close up the bunny’s head, and only using 10 sts to make the ear.

2014-01-02 086

Make perfect sense? It will when you have it in front of you. I promise.

After making your second ear, go ahead and top off your bunny with the last amounts of stuffing and kitchener him closed. I did not do any duplicate stitching for the ears, because I didn’t feel as though Baxter was in a particularly cutesy mood. He’s more of a sedate, cool, woodsy bunny, even though he does look a little anxious.

2014-01-02 082

After that, cut out all your felt pieces and sew them on with gusto, just like you did with your owl and carrot. Didn’t make those? Just take tiny stitches, and be sure to hide all of your knots on the inside of your work. I find that stitching the pupils onto the eyes first makes things a lot easier. Make sure his teeth are slightly crooked, and you’re all good to go!

2014-01-02 078

Wait! Don’t forget to make the pom-pom tail! I bought my very first pom-pom maker for this, and I have to say, it was an extremely enjoyable experience. Something about that fat, plump pom-pom is very satisfying, especially since I have only been able to turn out limp, floppy ones in the past. The thing I am getting at here is — go and buy a pom-pom maker right now. Even if you don’t use it much, it will make your life better.

2013-12-29 112-1

And you will make someone else’s life better when they receive their new squishy friend.  Now, go make a bunny and make somebody happy.

Russell the Carrot, your new best knitted friend

2013-08-05 004

My friend and coworker Stevi had a baby last winter, and I never got a chance, what with school and all, to make her new baby boy anything fun. However, as my summer draws to its close, this problem has been officially solved.

Meet Russell the Carrot. Russell is a fantastic orange friend who will add joy to your life. Not only is he good for your eyesight, but he is extra huggable and squishable, and has a smile for every occasion. Apparently, Stevi’s son is really into hugging, and he loves anything with a smiley face, so Russell should be right up his alley.

2013-08-05 005

I had the (rare) presence of mind to write all of Russell’s creation down as I was making him, so I am presenting his pattern here for all to enjoy. When I was searching for knitted and crocheted carrot patterns originally, I was a little discouraged to see how tiny they all were, because we were looking for something big enough and durable enough for lots of play. I think that Russell will fill that void nicely in the knitting world.

For his eyes, I went ahead and tried to do something similar that I did with Mr. Sedaris’s Owl, and came up with something that’s halfway between Heidi Kenney (Are you familiar? You should be.) and the Muppets. I feel like that’s a pretty good place to be.

Here we go. Want a clean and easily printable PDF? Just click here.

2013-08-05 010

Russell the Carrot
a knitted carrot friend

Yarn:
Peaches & Cream Cotton in color 1628 – bright orange (but any worsted-weight cotton will do)
small amounts of worsted-weight green and red yarn for carrot leaves and smiley face

Supplies:
US size 5 (3.75 mm) double-pointed needles (Gauge is not the most important thing in the world here, but you want to make sure that the resulting fabric is tight enough to not allow stuffing to poke through. I got about 6 sts per inch with this particular yarn and needle combination.)
Size F/5 (3.75 mm) crochet hook
tapestry or yarn needle
polyfill stuffing
scissors
white and black felt for eyes
sewing needle
sewing thread in black and white

Abbreviations & Definitions:
m1: Pick up the bar between the st just worked and the next st, and place it on the LH needle. Knit into the back of this loop to inc 1 st.

ssk: Slip the next 2 sts as if to knit. Insert the LH back into the front of these two sts and knit them together to dec 1 st.

k2tog: Insert the RH hand needle through the front of the next 2 sts as if to knit and knit the 2 sts together to dec 1 st.

For all crochet stitches and abbreviations? The internet is a much better resource than me for this, trust me. I am not so good at explaining those. Have fun with Google.

Carrot Body:
CO 3 sts. Keep these 3 sts on one double-pointed needle, and knit in I-cord for 2 rounds, pulling the yarn across the backs of the sts to close the resulting “tube.”

Divide the 3 sts onto 3 separate needles.

Round 1: *k1, m1* 3 times (6 sts)
Rounds 2-6: knit all sts
Round 7: *k1, m1, k1* 3 times (9 sts)
Rounds 8-12: knit all sts
Round 13: *k1, m1, k2* 3 times (12 sts)
Rounds 14-18: knit all sts
Round 19: *k1, m1, k3* 3 times (15 sts)
Rounds 20-24: knit all sts

2013-08-05 012

Round 25: *k1, m1, k3, m1, k1* 3 times (21 sts)
Rounds 26-30: knit all sts
Round 31: *k1, m1, k5, m1, k1* 3 times (27 sts)
Rounds 32-36: knit all sts
Round 37: *k1, m1, k7, m1, k1* 3 times (33 sts)
Rounds 38-42: knit all sts
Round 43: *k1, m1, k9, m1, k1* 3 times (39 sts)
Rounds 44-48: knit all sts
Round 49: *k1, m1, k11, m1, k1* 3 times (45 sts)
Round 50: knit all sts
Round 51: *k1, m1, k13, m1, k1* 3 times (51 sts)
Round 52: knit all sts
Round 53: *k1, m1, k15, m1, k1* 3 times (57 sts)
Round 54: knit all sts
Round 55: *k1, m1, k17, m1, k1* 3 times (63 sts)
Round 56: knit all sts
Round 57: *k1, m1, k19, m1, k1* 3 times (69 sts)

2013-08-05 017

Rounds 58-65: knit all sts

This is a good time to start stuffing. Make sure you use something to get that stuffing all the way down into the carrot point, like a chopstick or the eraser end of a pencil, before you fill it up too much. Keep stopping to stuff the carrot intermittently as you go through the following steps to ensure a firm, but squeezable, carrot friend.

Round 66: *k1, ssk, k17, k2tog, k1* 3 times (63 sts)
Round 67: knit all sts
Round 68: *k5, k2tog* 9 times (54 sts)
Round 69: *k4, k2tog* 9 times (45 sts)
Round 70: *k3, k2tog* 9 times (36 sts)
Round 71: *k2, k2tog* 9 times (27 sts)
Round 72: *k1, k2tog* 9 times (18 sts)
Round 73: k2tog all the way around (9 sts)

Break yarn. Put in your final bits of stuffing, pushing it down as far as possible. Thread the remaining sts onto a yarn needle, and draw the yarn through the sts, pulling them tight to close the top. Fasten yarn securely with a small knot, if necessary, to keep the hole closed. Weave in ends.

Carrot Accoutrements:
Attach green yarn to top of carrot, using the top “ring” of sts that you pulled closed, with crochet hook and a slip stitch. Make a series of chain sts of about 3-4″ long (or however long you want). At the end of the chain st row, turn back by skipping the first 2 chain sts and making double crochet stitches in every following chain st. Because the crochet hook used for this is much smaller than customarily used for worsted-weight yarn, the strips of double crochet will corkscrew around themselves, resulting in fun, curly carrot leaves.

2013-08-05 014

At the end of the row, when you get back to the top of the carrot, secure the strip by slip stitching into the top “ring.” Then make another strip! I made five of these, varying the lengths slightly throughout, and that seemed to fill in the top nicely, but you can make however many you want. Just be sure to finish the last strip by slip stitching into the top of the carrot. Then break your yarn and draw it through the last loop, pulling tightly. Weave in ends.

Cut small circles of white and black felt for the carrot’s eyes, and sew them securely onto the carrot. Just pick whichever of the three sides you think is the prettiest. I sewed the black “pupils” of the eyes onto the white circles first, and then attached the entire thing afterward, just for ease of handling. Make sure you knot everything securely and pull the ends of the thread through into the stuffing so that they can’t work loose.

Embroider a big smile onto your carrot using your yarn needle and red yarn, using back-stitching to get a nice smooth curve. In order to keep the stitching from pulling out, I was sure to thread my yarn through the stuffing (with the knot on the outside of the stuffing) before beginning and finishing the stitching. Keeping the knot on the outside of the stuffing will make it much harder to pull through, but keeps the yarn hidden inside of the knitting.

Hooray! You are done! Be pleased with yourself and your new carrot friend.